

Easy + Affordable Wood Bead DIYs
Ever wonder what you can create with wood beads? Hi, I’m Erika from @peonyandhoney! Y’all loved the DIY planters I created for the Lone Fox Journal last year, so today I’m back to show y’all how to create four new DIY’s—affordable wood bead home decor pieces! Wood beads are easy to find on Amazon, and are typically very low cost, so it makes sense to use them in all kinds of projects! Let’s get started on these home decor items all made with wood beads!

For the supplies for this project you will need:
-Rustoleum Bleached Stone Creations Textured Spray Paint
-Behr Chalk Paint in Miniature Rose

Instructions:
-Start by spray painting your wood balls and wood disc with the Behr Chalk Paint in Miniature Rose, making sure to coat the top, bottom, and sides of the wood disc and each side of the wood balls!

-Once they’re fully covered, spray them with the Rustoleum Stone Textured spray paint to add texture and a speckled look to the tray.

-After everything is fully dry, use a strong wood glue to adhere the wood balls to the bottom of your disc. Make sure they make an evenly spaced triangle.
-Let the glue dry overnight before flipping it over and styling it with whatever you want on it! It makes a great vanity tray or small plant stand!


For the supplies for this project you will need:
-1 Pack 15mm Split Wood Spheres
-1 Wood Shape (I found my flower shape at Dollar Tree)
-Paper Plate
-Q-tips
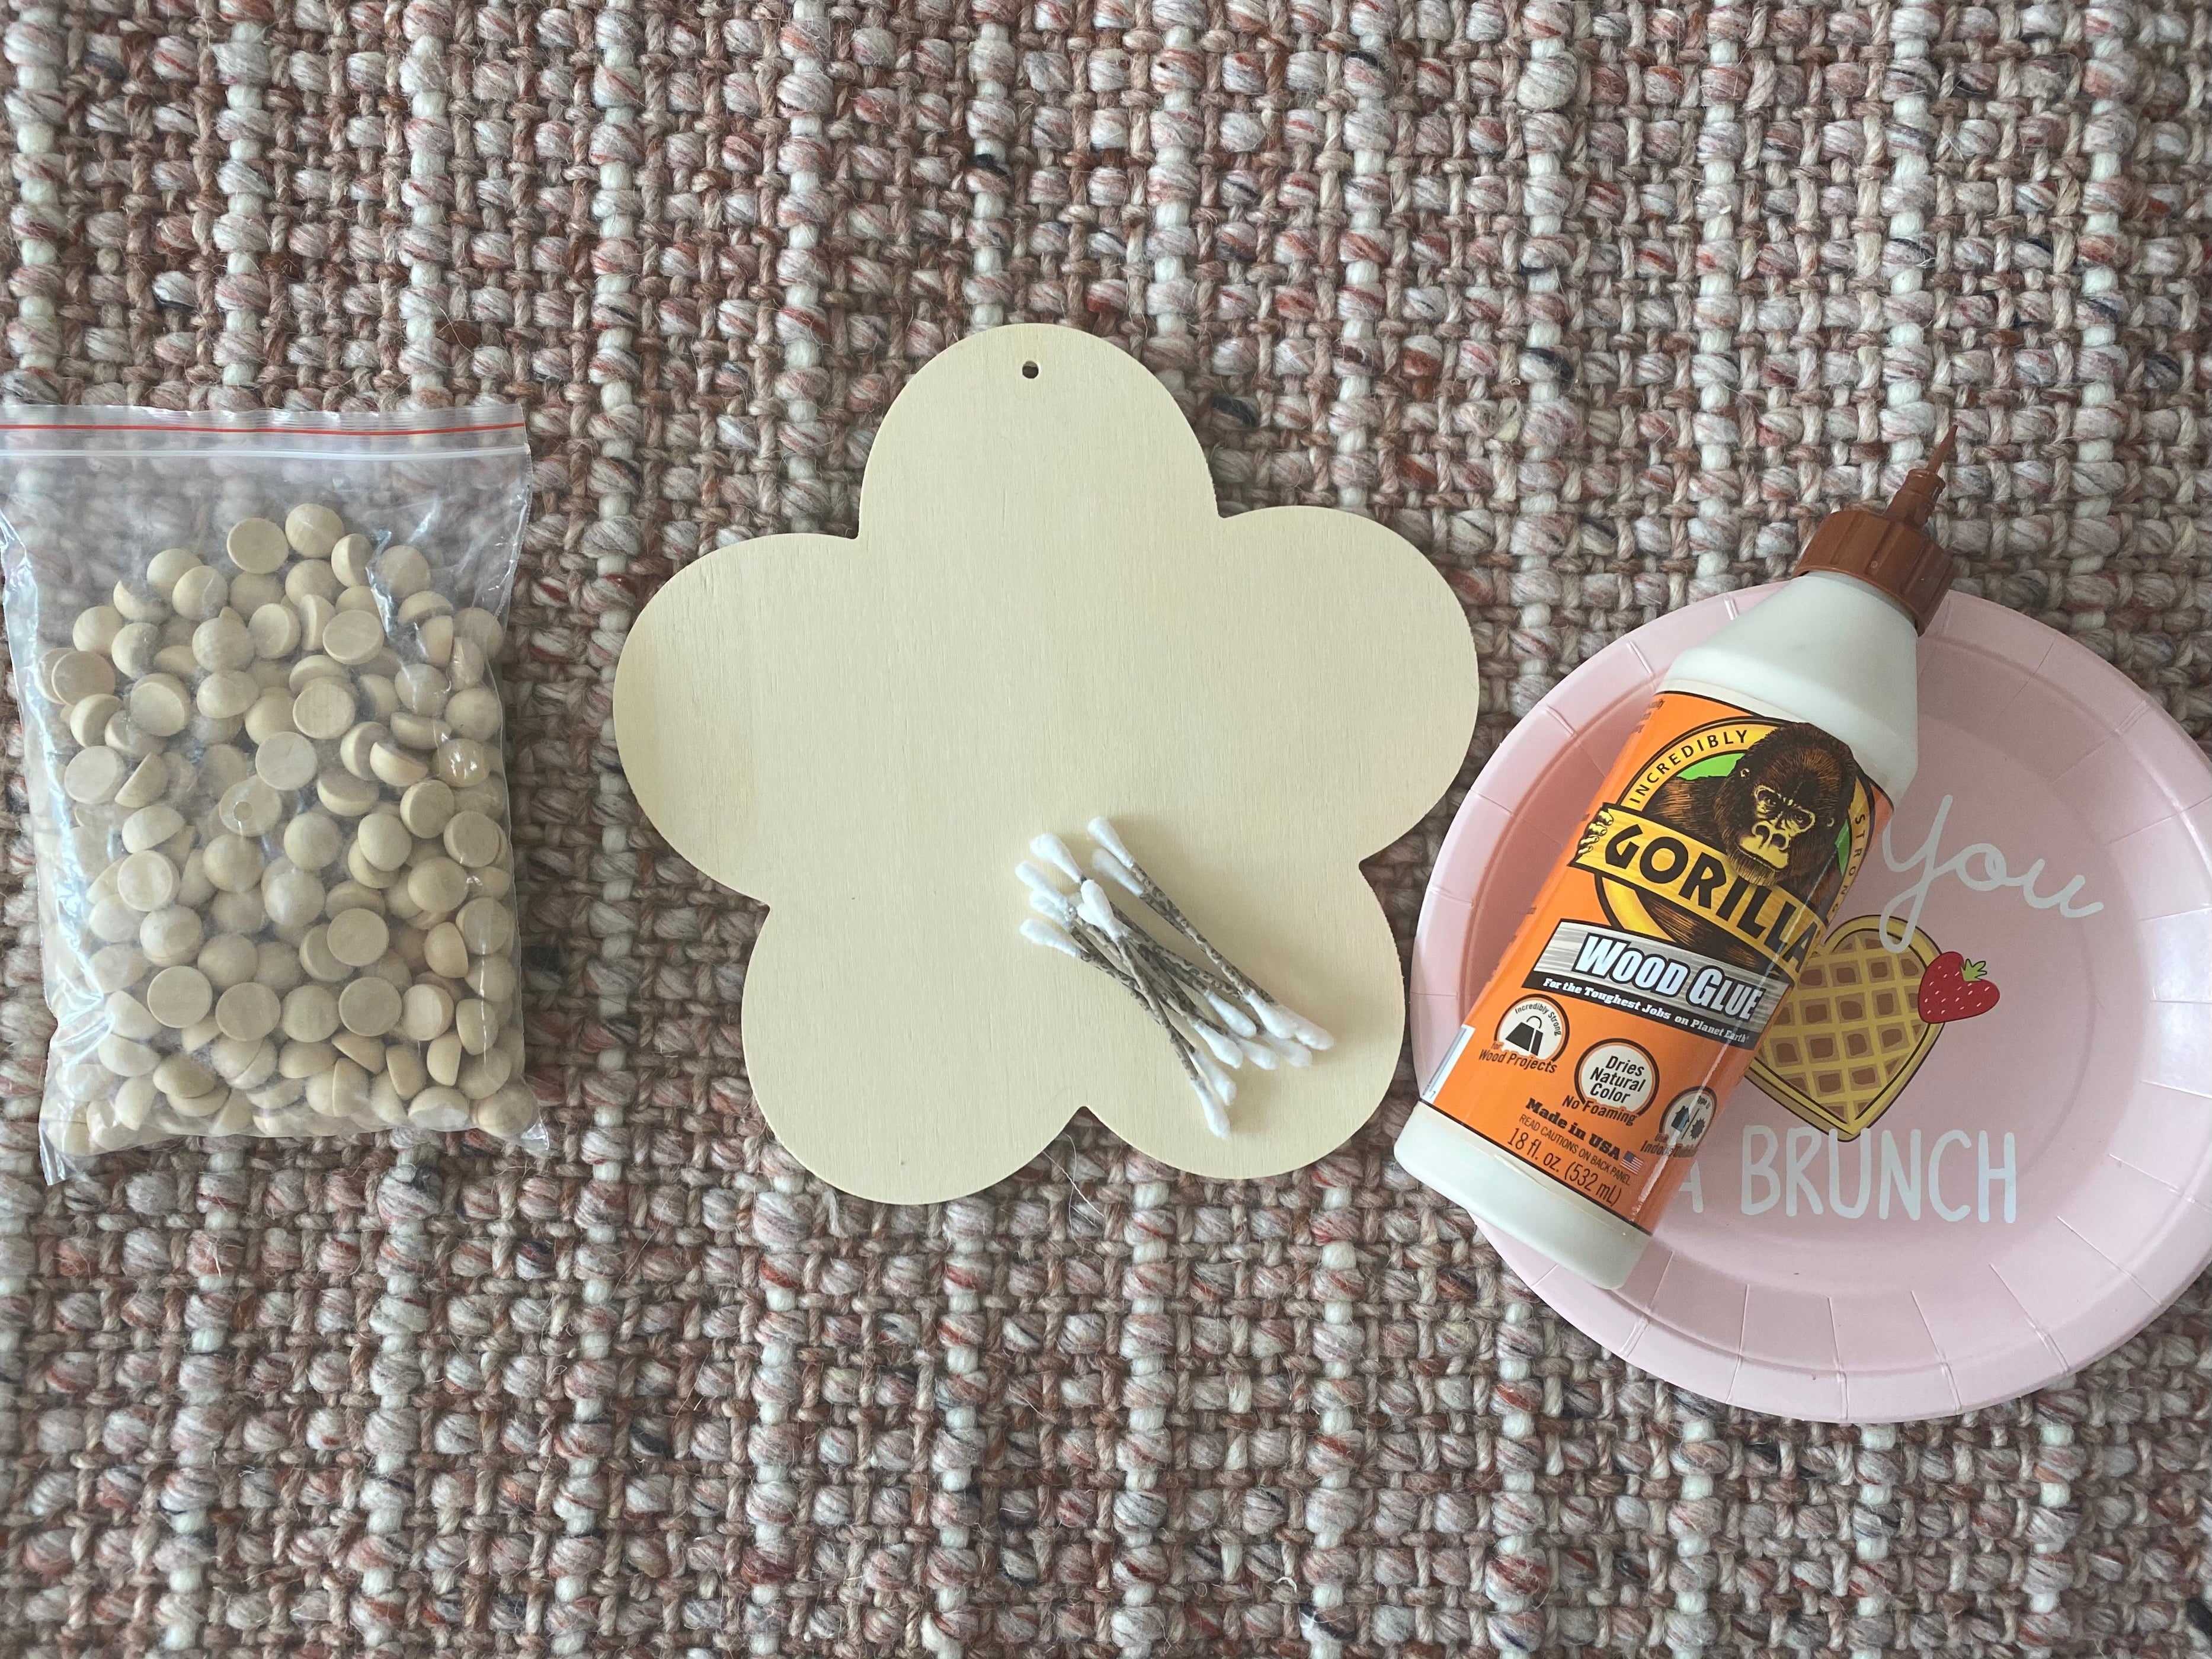
Instructions:
-This project is super straight forward! All you do is glue the half spheres to your wood shape! I like to start on the outside edges and work my way in. Just try to keep the gaps between each split wood sphere as uniform as possible throughout.
-It’s helpful to have a plate of wood glue and some Q-tips to easily apply the glue to the backs of each split wood ball.
-Once you’ve glued down all of them, allow 24 hours for it to dry! -Then, it’ll be ready to use under hot pans and bowls!
-You can also paint the piece when it’s done whatever color you wish, but I liked the natural look for this project!


For the supplies for this project you will need:
-1 Pack 25mm Split Wood Spheres
-1 Glass Vase (I got mine from Dollar Tree)
-Rustoleum Heirloom White Spray Paint
-Hot Glue Gun

Instructions:
-To begin, hot glue all of your half wood spheres around the glass vase in a tight row. Don’t leave any gaps unless necessary at the back.

-Keep applying the half spheres row by row until you can’t add another row. Make sure to keep your vertical and horizontal lines as straight as possible to make the vase look uniform!

-Then, give it a few coats of the Rustoleum Heirloom White spray paint and let it dry!

-I like this project because you can also apply this same technique to planters and vases of all sizes! Add your favorite dried florals for a boho look!


For the supplies for this project you will need:
-1 Pack of 20mm + 25mm Wood Beads
-1 Pack 1 1/2in Wood Beads 3 Different Sized Metal Hoops (Large, Medium, Small)
-Clear Packing Tape
-Yarn
-Hot Glue Gun
-Fishing Line

Instructions:
-Start by using the bolt cutters to make two cuts into each hoop, creating the rainbow arches.
-Then, thread on your wood beads with the largest hoop getting the biggest beads and the smallest hoop with the smallest beads, leaving about two inches on each side without beads.
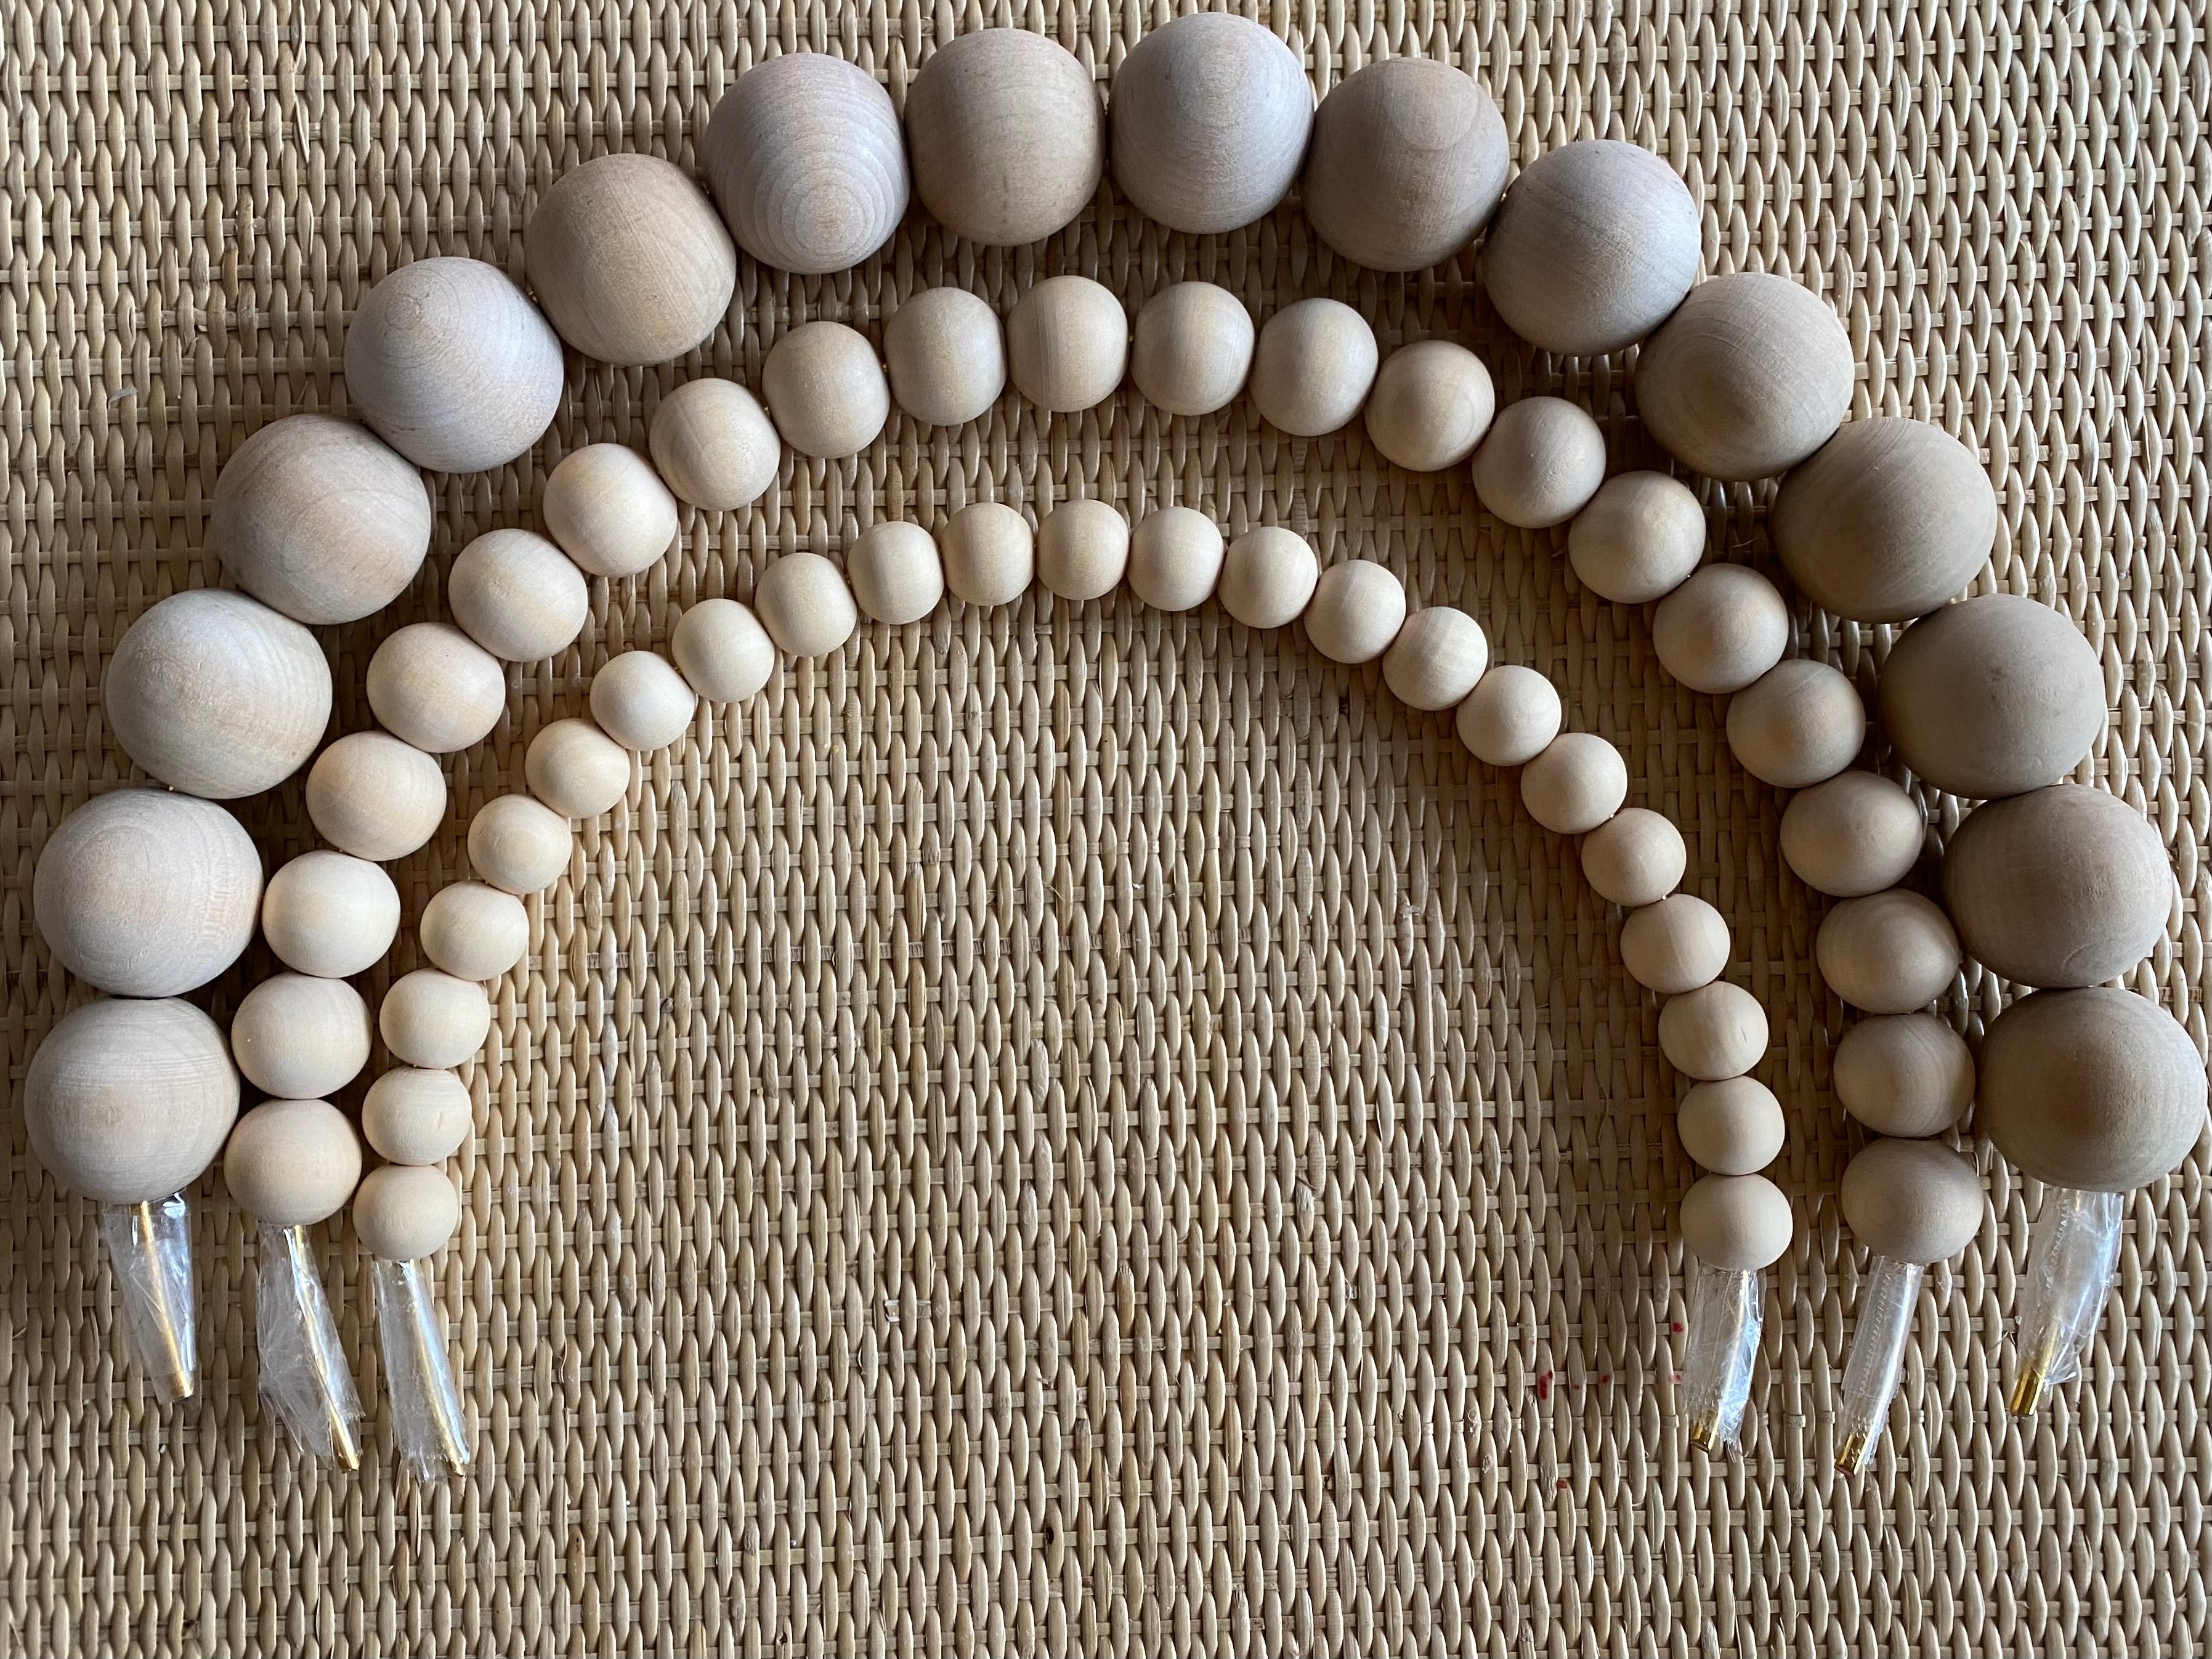
-Use your clear packing tape to tape around the ends and keep wrapping until you block the last bead on each side from falling off the ends of the arches. You can also use a generous amount of hot glue inside the last bead hole to act as a stopper for the beads.
-Then, using your Pom Pom makers and yarn, make 4 medium sized pampas, and two small ones. I made my medium Pom Poms with the large acrylic yarn and the small ones, I used some leftover off-white Dollar Tree thin yarn I had lying around just for some interest!
-Using your fishing line, tie the rainbows together in four different places to make sure they stay together.
-Also, using fishing line to make a loop at the top to hang your rainbow from! You can also use ribbon or yarn!

-Lastly, hot glue your Pom Poms onto the fronts of the ends of your arches. Use a little extra hot glue between the Pom Poms to keep them together! Once the glue cools, you can hang your rainbow on your front door hook or on the wall!

Thank y’all so much for checking out these DIY’s, and be sure to tag me @peonyandhoney and @lonefoxhome if you try any of them! We’d love to see your projects! These are all definitely achievable on any budget!
xo
Erika

Follow Peony and Honey for more DIY projects + Interior inspiration!